Metal Rod vs Metal Strip Vastu: Difference, Selection Rules, 4ft vs 8ft Guide
Many buyers purchase Metal Rod or Metal Strip before understanding correction objective. That single mistake can disturb sequence, delay stability, and increase rework cost. First understand the logic, then choose the product.
30-day protocol PDF - free download
Enter your email and get the guided template instantly.
If you are searching metal rod vs metal strip vastu or asking vastu correction rod or strip, this guide gives a clear decision framework from practical correction usage.
Metal Rod vs Metal Strip Vastu: Practical Selection Logic Explained
This comparison is not about which product is "better". It is about matching the right correction tool to the right objective. Correct match improves stability speed; wrong match increases rework.
Why This Confusion Happens
This confusion is common because both products are metal-based, both are used in correction workflows, and both may appear together in advanced plans. Many buyers assume they are interchangeable. In practice, their correction roles are different: rod anchors targeted points, while strip carries continuity across a route.
Conceptual Difference (Core Model)
Metal Rod = Energy Anchor Point. It is used where correction needs a precise point or short route with zone-material logic.
Metal Strip = Energy Flow Line. It is used where correction needs linear continuity across a span or boundary.
This simple model avoids 80% of wrong purchases.
Expanded Comparison Table
| Parameter | Metal Rod | Metal Strip |
|---|---|---|
| Primary correction logic | Point anchor correction | Line continuity correction |
| Installation depth | Localized and targeted | Extended across span/boundary |
| Error impact | High if wrong zone material | High if wrong span/alignment |
| DIY risk level | Medium in simple mapped cases | High where alignment is critical |
| Combination usage | Often paired with strips in advanced plans | Often paired with rods for precision points |
| Typical format | 12mm x 12 inch | 4ft / 8ft strips |
| Virtual entry relevance | Very high | Supportive where continuity required |
| Wrong substitution risk | Can weaken directional response | Can leave boundary correction incomplete |
Real Micro Cases
Case 1: Virtual entry issue, strip-only attempt
Correction required targeted anchor logic, but only strip was installed. Result stayed inconsistent. After mapped rod placement, response stabilized.
Case 2: Boundary imbalance, rod-only attempt
Rod points were installed where continuous line correction was required. Disturbance persisted. Adding strip continuity corrected the route.
Case 3: Mixed layout, random product purchase
Products were bought by discount, not by objective. Rework was required after zone verification and sequence planning.
What Happens If Wrong Product Is Used?
- Correction sequence gets disturbed.
- Directional misalignment can continue.
- Multiple revisions become necessary.
- Total cost increases due to rework.
Visual Understanding (Text + Diagram)
Think of it this way: Rod marks a point; Strip defines a line.
Decision Flow (Quick Selection)
- If issue is point-specific: choose Rod.
- If issue is linear boundary/span-specific: choose Strip.
- If issue is combined: use both in mapped sequence.
When Rod + Strip Are Used Together (Advanced Logic)
- Rod: stabilizes anchor points in the route.
- Strip: completes the linear boundary path.
- Sequence: Anchor -> Route -> Final balance review.
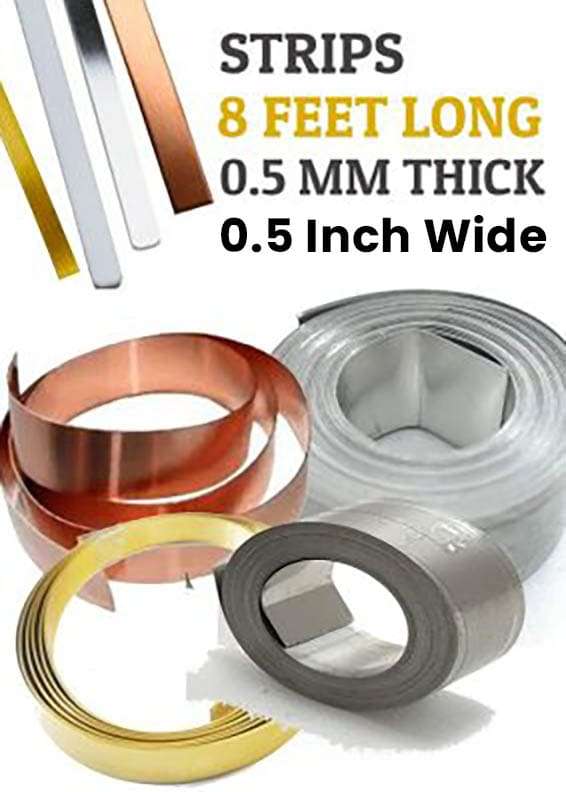
4ft vs 8ft Strip Use
One of the most searched practical questions is metal strip 4ft vs 8ft use. The answer is span-driven, not price-driven.
- Use 4ft where correction segment is shorter and controlled.
- Use 8ft where continuity needs a longer route with fewer breaks.
- Do not decide length by stock availability alone.
For deeper length logic, read 4ft vs 8ft Metal Strip Selection Guide.
Internal Product Path (Use Within Context)
If your map indicates point-specific correction, start with zone-mapped Metal Rod correction options. If continuity is required, review continuity-focused Metal Strip correction options. For material decisions, read the zone-wise metal rod selection guide before checkout.
For example, Fire-zone anchor plans often evaluate Copper Rod 12mm/12inch, while line continuity cases may evaluate Brass Strip 4ft.
Rod vs Strip Decision Summary
| Situation | Choose |
|---|---|
| Virtual entry correction | Rod |
| Boundary imbalance | Strip |
| Multi-zone mixed case | Rod + Strip |
| DIY minor mapped case | Rod (validated) |
| Long span route correction | Strip |
Rod vs Strip Selection Mistake Cost Example
In one practical case, wrong rod type was installed first, then removed and replaced after re-validation. In another case, wrong strip length caused continuity break and delayed completion. Both cases increased cost and time despite using genuine products. The cost of wrong sequence is usually higher than the cost of validation.
Additional Micro Scenarios (Decision Depth)
Case 4: Commercial reception route
A mixed office layout had repeated movement conflict near entry. The team selected strip length by availability rather than route need. After mapped reassessment, continuity route and anchor points were corrected in proper order, and implementation became stable.
Case 5: Home-office overlap
A residential room used for client calls had boundary drift and stress complaints. Rod-only correction gave partial response. After adding mapped strip continuity, usage rhythm improved and repeated adjustments reduced.
Implementation Depth (Practical Sequence)
- Define objective clearly: point-anchor, continuity route, or mixed.
- Validate active zone and expected correction behavior.
- Select product type first, then material and size/length.
- Implement in mapped order without reversing rod-strip logic.
- Review after initial usage cycle before any change request.
Residential vs Commercial Decision Note
Residential cases usually prioritize daily stability and movement comfort. Commercial cases require stricter continuity and predictable route behavior because rework cost is higher. For mixed-use properties, pre-purchase validation is strongly recommended.
Who Should Choose What First (By Property Type)
| Property Context | Typical First Check | Suggested Starting Route |
|---|---|---|
| Apartment / Flat | Entry movement + room usage conflict | Rod-led correction, then strip if continuity needed |
| Independent House | Boundary continuity + internal anchor points | Combined route based on mapped sequence |
| Office / Shop | Customer path + decision zone stability | Strip continuity with targeted rod anchors |
| Mixed Use (Home + Work) | Dual-purpose room and route collision | Validation first, then combined route |
This table is not a fixed rulebook, but a practical starting lens. Final selection should still follow objective mapping for your actual layout.
Common Myths That Cause Wrong Purchases
- Myth 1: "Rod and strip are same; whichever is cheaper is fine."
Reality: Their correction functions are different, so substitution can weaken outcomes. - Myth 2: "Longer strip is always better."
Reality: Wrong length in constrained route can create alignment drift and rework. - Myth 3: "If one correction works in another property, it will work here."
Reality: Route behavior is layout-specific. Copying without mapping is risky. - Myth 4: "Consultation is needed only for very large projects."
Reality: Even small layouts with multi-zone overlap can fail without sequence clarity.
Post-Installation Monitoring Framework (First 30 Days)
This monitoring window prevents premature changes and helps distinguish temporary adjustment effects from real route mismatch.
Zero-Rework Handover Checklist (For Installer or Team)
- Share the mapped objective in one line before installation starts.
- Mark rod points and strip routes physically before fixing any component.
- Record installed length/material against mapped recommendation.
- Take before/after photos for audit and future troubleshooting.
- Do not allow ad-hoc changes by on-site preference.
- Close with a short validation note: objective achieved / pending review.
Teams that follow this handover discipline usually avoid avoidable rework and preserve correction consistency.
Cluster Expansion (Advanced Reads)
Professional Caution
Do not mix rod and strip without map validation. Changing correction sequence or reversing rod-strip order can create instability. Always follow mapped installation order to protect outcome quality.
DIY Risk Snapshot
| Case Type | DIY Risk | Recommendation |
|---|---|---|
| Single minor mapped point issue | Medium | Proceed carefully with checklist |
| Linear span correction with multiple joints | High | Validate strip route before install |
| Mixed rod + strip + spring case | Very High | Consultation strongly recommended |
| Commercial layout correction | Very High | Use mapped expert sequence |
Pre-Purchase Audit Questions
- Have I validated objective, zone, and expected correction behavior?
- Do I know why rod/strip is selected for this specific route?
- Is length/material choice based on mapped need, not stock or discount?
- Is the installation order written and understood by executor?
FAQ
- Are rod and strip interchangeable? No. Their correction functions are different.
- Should both be installed in every case? No. Use depends on correction objective.
- Can strips be cut freely? Only if map logic permits it.
- Can rod be replaced with strip to save money? Avoid substitution without validation.
- Can one strip length work for all rooms? No. Length depends on span and route continuity.
- When should I review after installation? Review after initial usage cycle and if instability continues.
If You Are Unsure Between Rod and Strip
Book Zone Validation Before Purchase when any of these apply:
- Objective is unclear
- Multi-zone involvement
- Repeated correction failure
- Commercial + residential overlap
- Unclear rod-only / strip-only / combo route
In these cases, book a Zone Validation Session before purchase. This prevents wrong buying and protects correction outcomes.
Related Reading
- How to Select the Right Metal Rod
- 4ft vs 8ft Metal Strip Selection Guide
- Non-Demolition Correction Sequence
- Advance Remedies Complete Guide (Pillar)
Final Professional Checklist
Tick each point while reviewing a Vastu plan or guidance page so core validation is not skipped.
Common mistakes to avoid
- Applying remedies before confirming entry, zone, and room logic.
- Mixing informational guidance with heavy sales intent.
- Using fear-heavy language instead of measurable guidance.
Final Takeaway
The real difference between rod and strip vastu is objective, not appearance. Rod anchors points, strip secures continuity. Therefore, metal rod vs metal strip vastu comparison is most useful when used for objective-based decisions.


Comments & Ratings